Parts & Tools required:
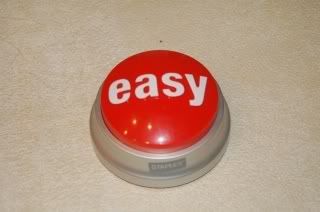
Staples Easy Button $4.95
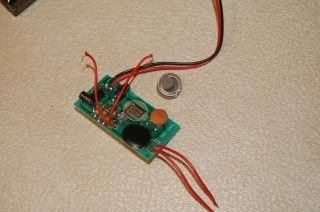
Radio Shack part #276-1323, 9 volt recording module $11
Radio Shack part #275-1571 momentary contact switch N/O $3
Radio Shack part # 274-248 1/8” jack N/C $3
Small tip soldering iron
Solder
Hot glue gun
Dremel tool or similar plastic cutter
Small Philips head screw driver
Wire cutter
Razor knife
Disassembling the unit is very easy. Remove the rubber legs to get to the small screws that hold it together. Remove the battery compartment cover and the batteries
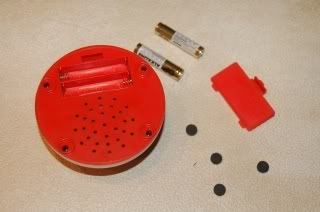
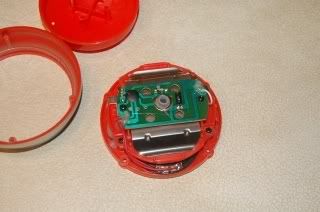
Continue to dissasemble the unit. Remove the metal 'snap' bracket. Remove the circuit board, speaker and small weights from the sides. Then remove the top plastic housing.

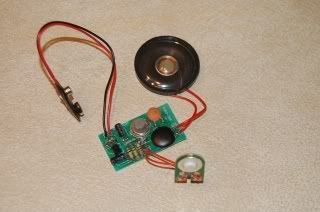
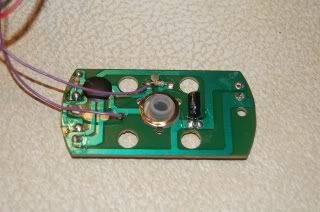
Remove the speaker and the button from the recording module leaving only the 9-volt connector.
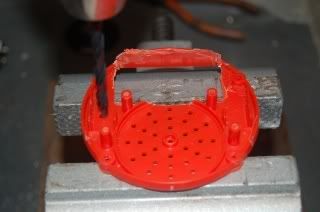
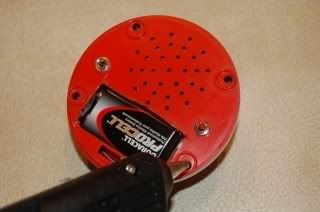
Now the fun begins. Using the Dremel you have to cut out the original AA Battery compartment to accomodate the 9 volt battery. Pop the connector tabs on the back and remove the metal connector tabs from inside the compartment. Detailed wiring instructions .
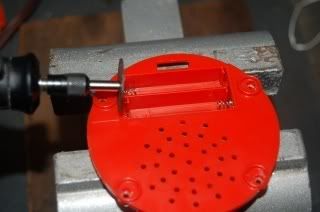
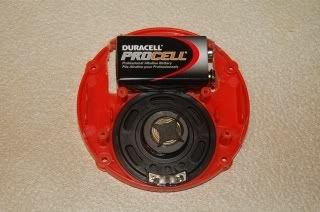
Insert the 9-volt battery and check for fit. You will also have to grind a small area of the original speaker to make it fit snugly. Be careful here! You don't want to cut into the cone area.
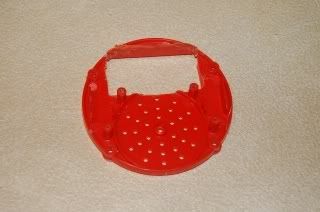
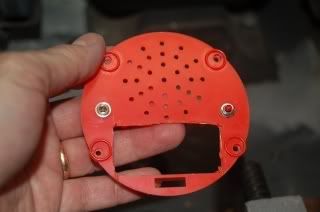
Your finished cutout should look similar to this.
Drill the holes for the 1/8" jack and the switch.
1/8" jack and the contact switch installed

Using the tabs on the underside, pop out the recording module button. Solder two wires to the switch area.
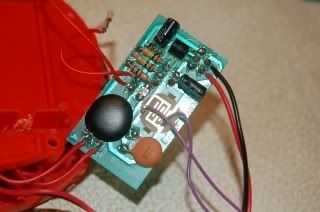
Then solder those wires to these two connections on the old switch. You also need to solder the wires from the speaker to the 1/8" jack and from the 1/8" jack to the speaker connections on the recording module. Also solder wires from the contact switch to the recording module. Attach the 9-volt battery.Test it out by pressing the contact switch and speaking into the speaker. Press the original circuit board button and make sure everything works before re-assembly.
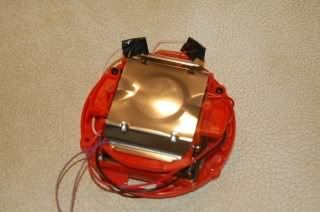
I used electrical tape to shield everything. Reinstall the top plastic piece and tighten securely. Then place the recording module in the top plastic housing.
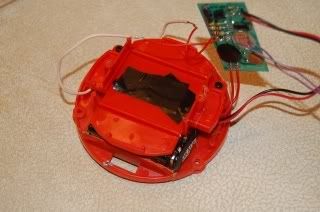
Reinstall the metal 'snap' bracket. Then re-install the original circuit board. Make sure everything fits snuggly and all wires are secure and/or hidden.
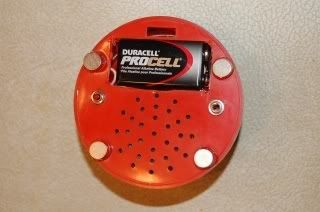
I hot glued some magnets to replace the regular rubber feet. Now you can stick it in a number of places.
Have Fun!
Posted by James from http://coolhacksfromjamez.blogspot.com/
No comments:
Post a Comment